快速开始
备注
阅读本篇前,请确保已按照 安装教程 准备好昇腾环境及 OpenCV !
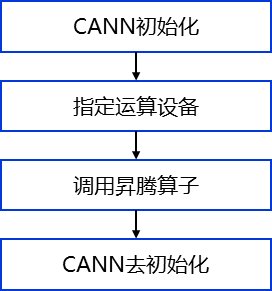
OpenCV 中昇腾算子入参列表和 cpu 及 cuda 算子保持一致,除了对昇腾必要的初始化、去初始化之外,用户无需学习 CANN API,仅需要将原来的接口添加 cann 包名(C++ 接口为使用 cann 命名空间),整体流程如下图所示:
图像处理
OpenCV 当前支持 20+ 昇腾算子,此处根据图像处理应用场景,选取 add, rotate 和 flip 算子的应用作示例代码,
更多算子见 OpenCV 官方文档。
使用 C++
备注
通过命令行传参 input 和 output 来指定输入和输出图像路径
 1// This file is part of OpenCV project.
 2// It is subject to the license terms in the LICENSE file found in the top-level directory
 3// of this distribution and at http://opencv.org/license.html.
 4
 5#include <iostream>
 6#include <opencv2/imgcodecs.hpp>
 7#include <opencv2/cann.hpp>
 8#include <opencv2/cann_interface.hpp>
 9
10int main(int argc, char* argv[])
11{
12    cv::CommandLineParser parser(argc, argv,
13    "{@input|puppy.png|path to input image}"
14    "{@output|output.png|path to output image}"
15    "{help||show help}");
16    parser.about("This is a sample for image processing with Ascend NPU. \n");
17    if (argc != 3 || parser.has("help"))
18    {
19        parser.printMessage();
20        return 0;
21    }
22
23    std::string imagePath = parser.get<std::string>(0);
24    std::string outputPath = parser.get<std::string>(1);
25
26    // 读取输入图像
27    cv::Mat img = cv::imread(imagePath);
28    // 生成高斯噪声
29    cv::Mat gaussNoise(img.rows, img.cols, img.type());
30    cv::RNG rng;
31    rng.fill(gaussNoise, cv::RNG::NORMAL, 0, 25);
32
33    // cann 初始化及指定设备
34    cv::cann::initAcl();
35    cv::cann::setDevice(0);
36
37    cv::Mat output;
38    // 添加高斯噪声到输入图像
39    cv::cann::add(img, gaussNoise, output);
40    // 旋转图像 (0, 1, 2, 分别代表旋转 90°, 180°, 270°)
41    cv::cann::rotate(output, output, 0);
42    // 翻转图像 (0, 正数, 负数, 分别代表沿 x, y, x 和 y 轴进行翻转)
43    cv::cann::flip(output, output, 0);
44    // 写入输出图像
45    cv::imwrite(outputPath, output);
46
47    // cann 去初始化
48    cv::cann::resetDevice();
49    cv::cann::finalizeAcl();
50    return 0;
51}
使用 Python
备注
通过命令行传参 input 和 output 来指定输入和输出图像路径
 1# This file is part of OpenCV project.
 2# It is subject to the license terms in the LICENSE file found in the top-level directory
 3# of this distribution and at http://opencv.org/license.html.
 4
 5import numpy as np
 6import cv2
 7import argparse
 8
 9parser = argparse.ArgumentParser(description='This is a sample for image processing with Ascend NPU.')
10parser.add_argument('image', help='path to input image')
11parser.add_argument('output', help='path to output image')
12args = parser.parse_args()
13
14# 读取输入图像
15img = cv2.imread(args.image)
16# 生成高斯噪声
17gaussNoise = np.random.normal(0, 25,(img.shape[0], img.shape[1], img.shape[2])).astype(img.dtype)
18
19# cann 初始化及指定设备
20cv2.cann.initAcl()
21cv2.cann.setDevice(0)
22
23# 添加高斯噪声到输入图像
24output = cv2.cann.add(img, gaussNoise)
25# 旋转图像 (0, 1, 2, 分别代表旋转 90°, 180°, 270°)
26output = cv2.cann.rotate(output, 0)
27# 翻转图像 (0, 正数, 负数, 分别代表沿 x, y, x 和 y 轴进行翻转)
28output = cv2.cann.flip(output, 0)
29# 写入输出图像
30cv2.imwrite(args.output, output)
31
32# cann 去初始化
33cv2.cann.finalizeAcl()
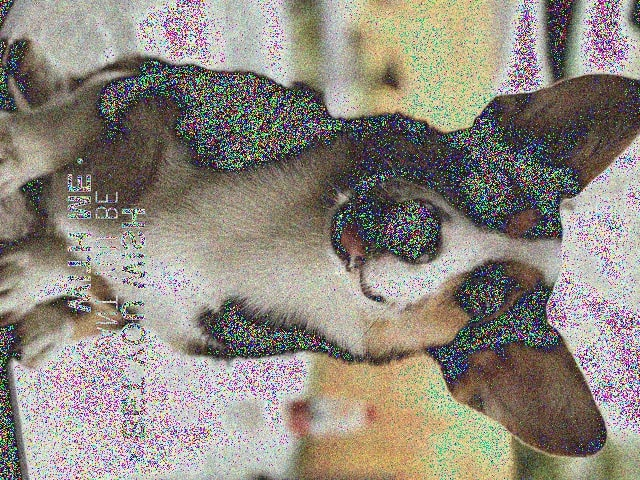
图像处理结果
本示例使用输入图像如图所示:

通过上述 Python 或 C++ 示例代码处理,得到的输出图像为: